Monday, July 28, 2008

Summer Inspiration #4

Just wanted to share this super simple mini album....


"Friendship Mini Album" By Kim Loewen
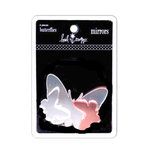
(supplies: patterned paper, gel blossoms, bling, mirror butterflies, silhouette words, ghost butterflies, ribbon, felt flowers, writers block, chandelier crystals, mask, die-cuts, rounded floral, chipboard alphabet: Heidi Swapp; patterned paper, black journaling pen: American Crafts; journaling shape, sticker, die-cut circle: Making Memories; glimmer mist: Tattered Angels; scalloped sticker: Martha Stewart; material, jewels, zip-tie, ribbon: Other)


By just using patterned paper and attaching it at one end I created a simple mini album...so easy and so cute! This is something that can be done easily in one night...especially if you use coordinating products and pictures from one event. Add some journaling and you're done! Print your pictures from one particular outing this month and create a mini album in one night!!
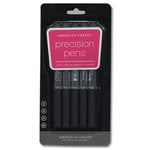


(these are my favorite pens!! Love them!!!)


Don't forget that Talia will be back next week with another cute thing to share!!


Kim :)

Monday, July 21, 2008

Summer Inspiration #3

Happy Monday!


Stopping by again with another layout for ya...


"Sweet Girls" by Talia Audenart
(supplies: patterned paper, clear accent, polka-dot mask: Heidi Swapp; die-cut accents: Making Memories; foam letters: American Crafts; other: ric-rac)


I TOLD you this is my favorite color combo right now! When I really love something I can't help but go with it...so here it is again! I did a 6 x 12 page to change things up a bit...I love variety when it comes to page sizes in my scrapbooks. Do a 6 x 12 layout today!


Thanks for stopping by, and we'll see you again next Monday!


Talia:)

Monday, July 14, 2008

Summer Inspiration #2


"My Favorite Things" By Kim Loewen
(supplies: patterned paper, glossy extras, bling floral centers, bling borders, chipboard alphabet, alphabet rub-ons: Heidi Swapp; glittered chipboard letters: Doodlebug; paper flower: Bazzill Basics; tulle, staples: Other)


I've made an effort to do more scrapbooking about myself lately...secretly it's just an excuse to use pink every now and then...hehe!! But why not change it up a bit and use colors you don't normally use or topics you don't often scrapbook. It will be a nice change and can get your creativity going. Give it a try!


And make sure you check back again next Monday for more inspiration!! Tal has something really fun to share!


Kim :)

Monday, July 7, 2008

Summer Inspiration #1

Hey, Everyone!


Well, it's the beginning of the summer...hopefully you're all enjoying some good weather and fun summer vacations! I just wanted to stop in to share a layout with you...maybe you'll find some time to scrapbook!


"Happy Life" by Talia Audenart
(supplies: patterned paper, die-cut accents: Making Memories; foam letters, mirrors, scalloped tape: Heidi Swapp; glittered chipboard letters: Doodlebug)


This is my FAVORITE color combo right now...pink and turqoise! Even though this isn't a "summer" layout, the colors feel fun, bright and "summery" to me. I had these pictures left over from another project I was working on that never got completed, so I thought I'd do a layout instead. Enjoy!!


Thanks for stopping by and come back next Monday for some more Summer Inspiration!


Talia:)

Monday, June 30, 2008

and the winner is...


Dana West!!!


Congratulations, Dana on a gorgeous layout! We love how she blended her strips of fabric, paper, ribbon and lace so seamlessly...beautiful! The whole page is just total eye candy...congrats, girl! Email us your mailing addy so we can send your Goodie Box to you...yay!


We also wanted to give the following ladies a "shout-out" for their submissions this month as well:

*Lene Tingberg (did you see her little fabric owls she made? HELLO!)
*Jill Williams (GORGEOUS use of fabric...I especially love the big gray cut-out flowers!)
*Sandy Pool (not only is this layout precious in content, but I loved her mix of colors and textures...beautiful!)


I feel like a broken record, I always say the same thing every month...it is just SO HARD to choose a winner at the end of each challenge! We want all of you to know how much we LOVE and APPRECIATE your work...if we could afford it, we'd be sending goodie boxes to you all! (wink) So thank you, thank you, thank you for another awesome month...there were lots of old faces as well as new ones this month, and that just makes us so happy. You guys are the best!!


So now, we just want to wish all of you a happy summer! We're taking a break from the challenges in July and August, but don't worry...come back EVERY MONDAY of the summer for a little bit of scrapbooking inspiration. We have some fun ideas to share with you! And of course, in September we'll be back with another challenge. Yay!!


Have a great summer!


Talia & Kim:)

Monday, June 23, 2008

fabric frames

Monday again, and we're back with our last bit of fabric inspiration for the month before we announce our winner next week!


Today I'm sharing these fun (and simple!) picture frames:


"Fabric Frames" by Talia Audenart

(supplies: frames: Ikea; felt butterflies, chipboard letter: Heidi Swapp; flower: Prima; button: KI Memories; other: tulle, fabric)


I don't know about all of you, but I always have a little stash of Ikea frames in my studio. As I had all of my fabric sitting out, I noticed my frames...and then I ended up with these! The little touch of fabric to these frames gave them just what they needed to enhance my photo, and add a little touch of pink to my daughter's bedroom.


Adding the fabric to these frames was very simple...here's brief how-to:

1. I placed a layer of felt underneath my fabric to make it a little puffy. Cut your felt to size (according to the frame or matte you are using). Adhere felt to background using a strong double-sided adhesive. (I used scrappy tape)

2. Cut fabric about 1.5 inches larger than your background or matte. Lay the fabric face down on your work space. Lay the background or matte, felt side down, on top of fabric. Fold edges of fabric tightly over the edge of your background, and adhere down with masking tape. Do this to all 4 sides. (I used lots of tape!)

3. If you covering a photo matte, once you are done step 2, then cut out the fabric where the picture will go, leaving a little bit of fabric so that you can fold it over the edges and tape it down, the same way you did to the outer edges.

4. Embellish as desired, add photos and you're done!


When I am making home decor projects I like to keep them simple...nothing too busy or involved. Now that I made these, I am thinking of all the fabric that I can add to my picture frames to make them just a *teeny* bit more fun. Hehe!! Hope you like them.


Okay, so this is the last time I'm gonna say it...you have till this Sunday night to email us your fabric submissions. Remember, it can be a page OR a project, and each person can send us 2 submissions in total. Email us your work to thegoodieboxgirls@hotmail.com with your first and last name. Thank you so much ladies!!!


We'll be back in a week with our winner!


Tal & Kim:)

Monday, June 16, 2008

a fabric album...


Fabric Mini Album by Kim Loewen

(supplies: vinyl embellishments, felt hearts: American Crafts; ribbon, felt butterflies, silhouette word: Heidi Swapp; grommets: Making Memories; ribbon: Love Elsie; ribbon: Martha Stewart; felt shape: Jenni Bowlin; felt flower: Creative Imaginations; iron-on transfers: Print 'n Press; ribbon, material, embroidery thread, buttons, binder ring, rick rack: other)


Who said fabric is only for quilts? Whip up your own little fabric album using Kim's instructions:

1. Print 10 pictures 2x3" on iron-on transfer paper
2. Iron onto cream colored fabric (following transfer directions)
and cut around pictures
3. Cut 12 pieces of fabric 5x7"
4. Attach the pictures to 10 of the fabric pieces using a blanket
stitch around the photo
5. Embellish each page with buttons, felt accents, ribbon, or
vinyl shapes
6. Sew a circle and title to a piece of fabric as the cover of the
album
7. Sew a message to a piece of fabric and glue on felt
embellishment as this will be the back cover of the album
8. Put a piece of quilt batting between each page of the album
9. Surge around edges of fabric to bind pages together
10. Use grommets and binder ring to keep album together
11. Tie ribbon around binder ring


Isn't this little fabric album that Kim made of her son to die for?? I just love it. And since it's soft and squishy, it's perfect for little hands to touch and play with...not like all of our paper projects, right? Since she used iron-on's for her photos, there's no worrying about fingerprints or bending the photos...totally kid-friendly. So so awesome, Kim! I can't wait to make one of my own!


Thanks for stopping by today, and remember we want to see your work! So send us your submissions by Sunday, June 29th so you can have a chance to win this month's Goodie Box.


See ya on Monday again for some MORE inspiration!


Talia & Kim:)